Your First Game in Unity: Ghost Evader: Part 05: Game Environment Setup
In this post we are going to set up the player sprite and the game environment using Unity Tilemaps.
Welcome to the next step in the setup for our game, Ghost Evader. This is a simple 2D top-down game where the player must collect coins and stay alive as long as possible. In this series we are going to go step by step and explain everything as clearly as we can.
Game Assets
If you are an artist, or a sound designer, you may choose to make your own assets. I am neither, so I will use assets created by others. The choice is yours. There may be some that feel a game developer should make their own assets. In the end, making a fun game that people love to play is more important, in my opinion.
For the sprites and game environment I am going to use the assets from the Tiny Dungeon set by Kenney. Before you use any assets, make sure you understand the license terms, especially if you intend to release your game publicly. In this case these assets I am using are covered by CC0 1.0 Universal at the time of this post.
The art assets I am using that are provided by Kenney are in PNG format. This is a common format for 2D games, and the image style is commonly referred to as pixel art. This style is often used in retro games and indie games due to its simplicity and nostalgic appeal.
Unity supports a wide variety of image formats, but to keep things simple, we’ll focus on PNG images.
Importing Assets
Importing assets into Unity is a straightforward process. To import assets, follow these steps:
- Open the Unity Editor.
- Navigate to the Assets folder in the Project window.
- Drag and drop the PNG image files into the Assets folder.
- Unity will automatically import the assets and display them in the Project window.
In this case there are only two images to import, we’ll discuss in more detail. If you select the tilemap_packed image in the Project Window, you should see something like this:
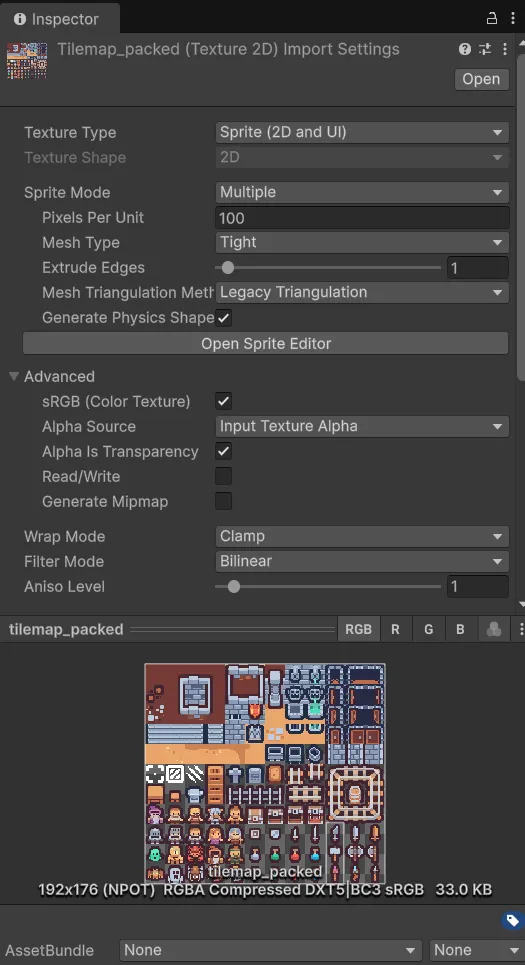
The artist is using what is called a sprite sheet. This is where you pack many individual images into one giant image rather than small individual images.
Unity supports sprite sheets, which is a common technique used in 2D game development to optimize memory usage and improve performance. Some artists will provide single images or both formats.
Unpacking Sprites
We will need to unpack the sprite sheet into individual images before we can use them in our game.
You will need to know the dimensions of each image within the sprite sheet. This information is usually provided by the artist or can be determined by analyzing the sprite sheet.
In this case Kenney has provided the dimensions of each image within the sprite sheet in a file called Tilesheet.txt.
Unity provides a built-in Sprite Editor that can help with this process.
We know by looking at the Tilesheet.txt file that are images are 16*16 pixels.
To unpack the sprite sheet, follow these steps:
- Select the
tilemap_packedimage in the Project Window. - Make sure the Texture Type is Sprite in the Inspector.
- Make sure the Sprite Mode is set to
Multiplein the Inspector. - In the Inspector select “Sprite Editor”, this will open the Sprite Editor window.
- In the Sprite Editor window, click on the “Grid By Cell Size” dropdown and enter
16for X and16for Y. - You should see a red outline for each sprite.
- If everything looks good, click the “Slice” button on the left and “Apply on the right menu to unpack the sprite sheet into individual images.
- The individual images will now expand out when you click the original physical image in the Project Window.
Setting the Player Sprite
Now that the sprite sheet has been unpacked, we can set the player sprite. You should be able to click the original physical image in the Project Window and see the individual images expand out.
Note the image that you will use for the player sprite. In this case, we will use the image labeled tilemap_packed_85.
Note, you can re-open the Sprite Editor window and give the image a more descriptive name by selecting it in the window and apply changes. We’re not going to bother with this.
We can then set the player sprite by selecting the tilemap_packed_85 image in the Project Window and dragging it into the Player game object in the Hierarchy Window. Or we can select the Player game object in the Hierarchy Window and click the Square sprite that is selected in the `Sprite Renderer component. This will create a dropdown which will allow us to select any image we want.
Adjusting the Player Sprite
Now that the player sprite is set, we can adjust the box collider to match the sprite. This way, the player can get closer to the walls and is more forgiving when colliding with ghosts.
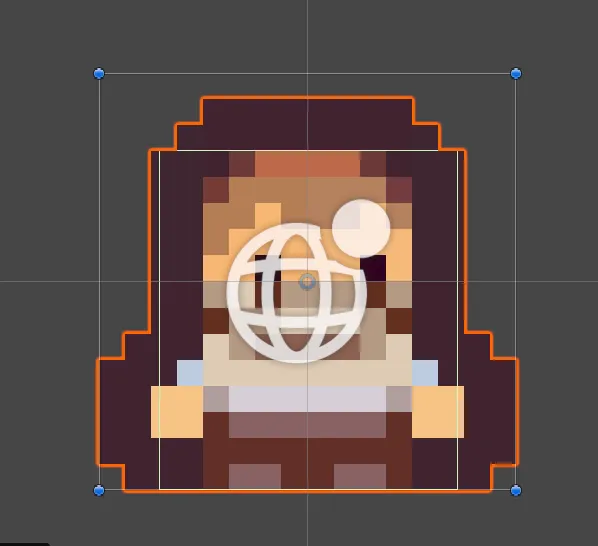
By moving the collider (the very light green line around the player) to inside the sprite image, we make it possible for the player to get really close to the walls. It also provides less area for ghosts to collide with.
Introducing Tilemaps
If we go back and look at our original image, you’ll notice that all the dungeon assets are also contained within the main sprite image, so let’s click this image to open up the sprite editor.
You’ll see basically our entire dungeon is contained within this particular image, so we’re going to need a way to deal with that.
Let’s create a Unity asset called a tile map so that we can actually map these assets to the screen.
Now we could pick these sprites and one by one add them to our game scene as well there’s nothing stopping us from doing that, but that’s a lot of work.
Either way it’s fine. That said, most people will use the unity tile map system because it’s a lot easier to paint with and to set up our levels without one by one placing individual sprites and looking through the menus for them.
Floor Design
So let’s set up our environment.
Go to the hierarchy and right-click, go to 2d object, then tile map, and for this particular game we want a rectangular tile map.
Go ahead and click that, and you’ll see it creates a game object called Grid.
We can have that tile map and any number of tile maps underneath. Let’s call this tile map while it’s selected Floor.
While we are here, let’s go back to the Grid game object and rename this to TileGridMap so we know what it is.
Now we’re going to need to open our Tile Palette, so inside the scene there should be a button that allows you to open the tile palette window. If not, you can manually open this via the menu via Window → 2D → Tile Palette.
This is a dockable window, so let’s dock it to the right-hand side. You can adjust the size of the Scene View window as needed, so now we have basically our workspace for creating our tiles.
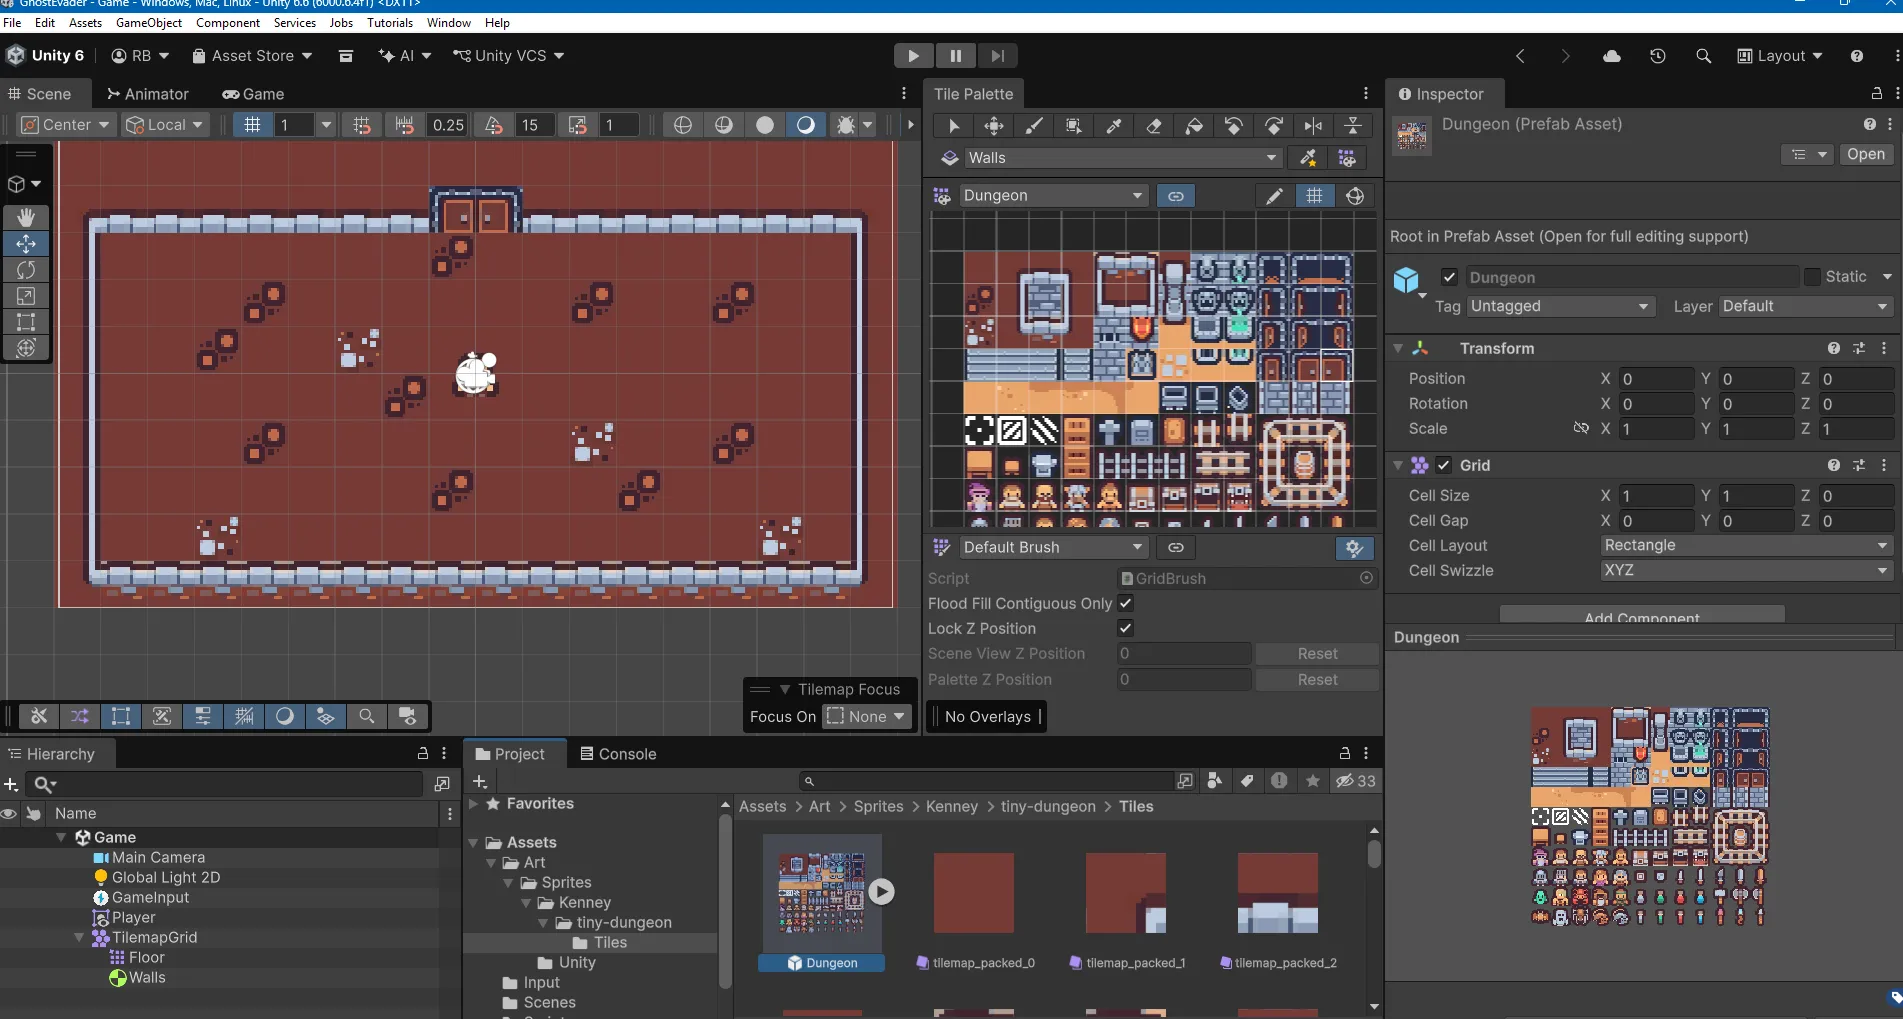
Select the image you want to place into the Tile Pallete in this case it is the tilemap_packed image we have been working on. Drag it into the Tile Pallete window here you’ll see Unity should let you drag that inside. Then you can release it.
You will then need to tell Unity where to save the individual tiles. In this case I use the Art → Sprites → Kenney → tiny_dungeon folder. Let’s place all the tiles in its own subfolder so let’s create a new folder and call it Tiles.
Once Unity sets up the tile palette, we can go back to the tilemap game object and call this Floor.
Painting the Level
You will now see the tile palette, and you will be able to select tiles for painting into the game scene.
You can use the keyboard paint with an active brush by pressing B. You can select an individual tile and clicking a square in the Scene View will place that tile there.
In this scenario I’m just going to pick a tile that is just a solid color to be the floor, start at the top and drag to create a box along the markers that indicate the screen edge.
Once a box is formed, I can then use the G key to fill the box in, and that will create the floor for my game level.
Setting Up the Walls
Our floor is now complete, and we can move on to setting up the walls. The walls will be created using the same process as the floor, but with different tiles.
We will need to select a different tile for the walls, and we can do this by selecting a different tile from the tile palette. Once we have selected the tile, we can then drag and drop it into the Scene View to create the walls for our game level.
But there is a trick to this, we can’t paint the walls to the same TileMap. This is because we need to tell Unity which tiles are the walls.
The cleanest way to do this is by creating a new TileMap layer to be the walls.
So we can go to our TileGridMap game object and add a new TileMap layer to it. We can do this by right-clicking on the TileGridMap game object in the Hierarchy window and selecting Create Tilemap like we did before.
Once we have created the new TileMap layer, we can then select the tile for the walls and drag and drop it into the Scene View to create the walls for our game level.
First, we’ll need to configure the new TileMap by adding additional components to this TileMap layer. We can do this by selecting the new TileMap layer in the Hierarchy window and then clicking on the Add Component button in the Inspector window. From there, we can search for and add the Tilemap Collider 2D component to the TileMap layer. This will allow us to interact with the walls in our game level.
Our job is not done yet. By itself, the Tilemap Collider 2D will make the entire painted area a collider. For example, if you then draw the walls, the entire painted area will be a collider. This is not what we want.
To fix this, we can add a Tilemap Composite Collider 2D component to the TileMap layer. This will allow us to create a collider that only covers the painted area, and not the entire TileMap layer.
Configuring our TileMap layer
Now we have added the Tilemap Collider 2D component to our TileMap layer, and a Tilemap Composite Collider 2D component to it as well. You will notice that when you added the Tilemap Collider 2D it automatically added a Rigidbody 2D component to the TileMap layer. We will need this.
Set the Rigidbody 2D component’s Body Type to Static. This will prevent forces from being applied to the TileMap layer. Additionally, static objects do not apply Gravity.
Last, you will need to set the Tilemap Collider 2D component’s Composite Operation to Merge. This will allow us to create a collider that only covers the painted area, and not the entire TileMap layer.
Make sure, when drawing the walls, you do not paint over the existing painted area intended to be the floor. If you do, you will need to use the Erase tool to remove the painted area. This will only affect the activeTileMap layer.
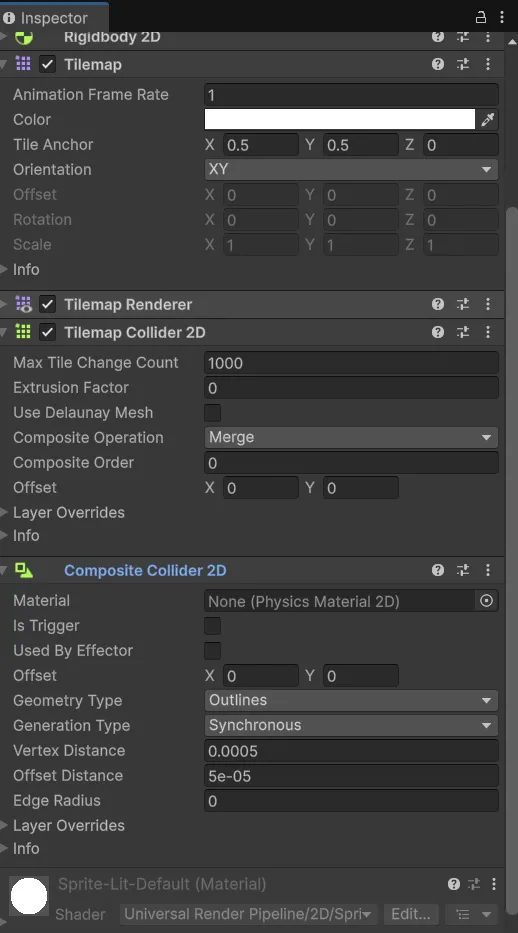
Leave the Composite Collider 2D settings as they are by default. This ensures that the collider will act as a wall.
Conclusion
We have now completed the setup of our game environment. The player should be able to move freely around the level, but will be unable to pass through the walls.
Next, we will add the ghost enemies to the game.