Your First Game in Unity: Ghost Evader: Part 02: Initial Setup
Hey everyone, welcome to the next step in the setup for our game, Ghost Evader. This is a simple top-down game where the player must collect coins and stay alive as long as possible. In this series we are going to go step by step and explain everything as clearly as we can.
In this post we are going to set up our Input Manager, our first player sprite and get our game underway.
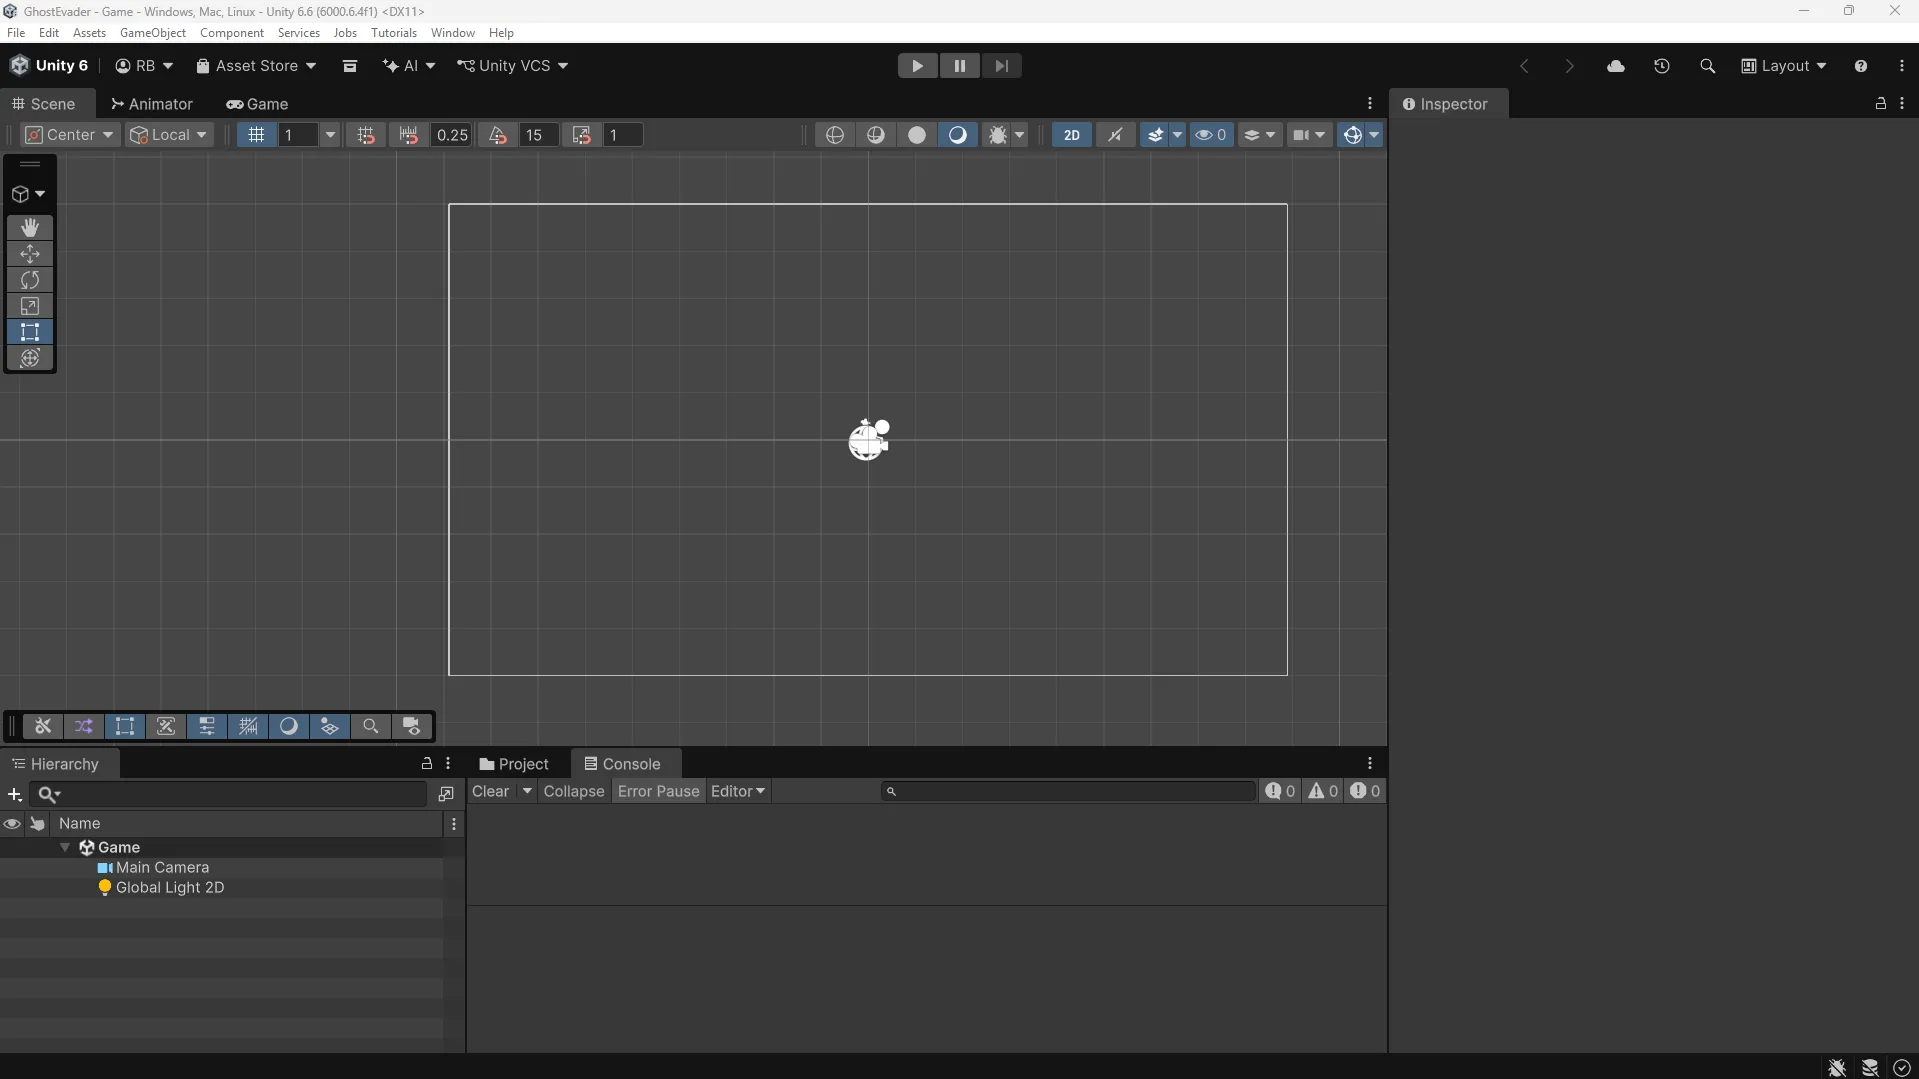
This is the starting point for our project, an empty 2D Unity Editor. We are using version 6.6 and the 2D Universal template.
This editor layout may or may not match your layout. You can customize all the editor panes/windows in Unity to get the workflow that works best for you.
What we will cover in this post
- Setting up the Input Manager
- Creating the Player Object
- Creating the dungeon boundaries
What we will not cover for this series
We do not plan to cover installing Unity or setting up the project, taking a tour of the hierarchy, etc. This is because we assume that you have already installed Unity and set up your project. If you need help with these steps, please refer to the Unity documentation or other tutorials.
As a reminder, you can download the project from the GitHub repository.
Game Objects
When setting up our game inside the Unity Editor, the first concept we need to wrap our heads around are Game Objects. In the Unity game engine, a GameObject is the fundamental building block for everything in your game.
You can think of a GameObject as an empty container. On its own, it has no shape, no color, no physics, and no behavior. It only becomes a character, a weapon, a light source, a camera, or a piece of scenery when you plug different Components into it.
Every Game Object has individual building blocks called Components. In Unity, you add components to a Game Object to give it the functionality you need.
See the Unity documentation for more info on Game Objects
In our opening scene we have a Main Camera game object and a Global Light 2D game object. If you click on either game object, you will see that the Inspector will change and display the components on that game object. You can then change the settings for each of these components to produce the functionality you want
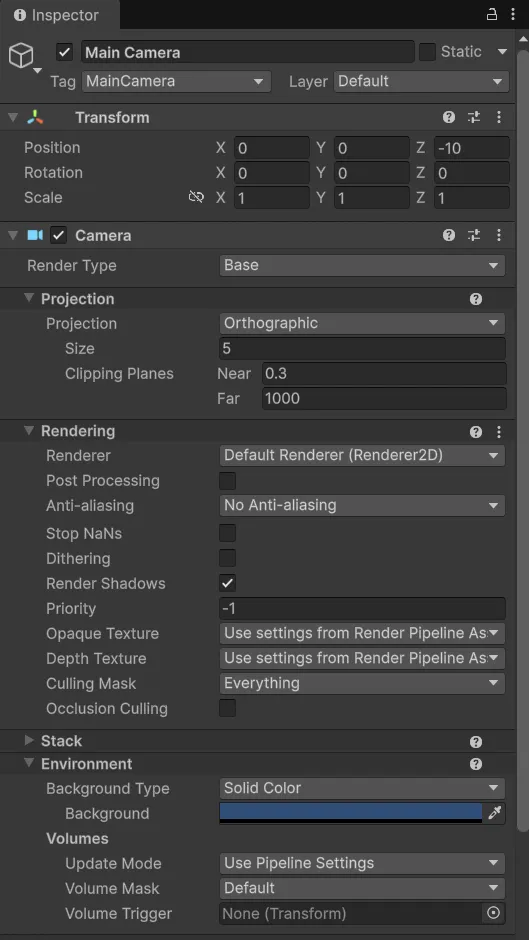
Properties of Game Objects
By default, the Game Object comes with a Transform Component. Transform component that cannot be removed. This tracks its Position, Rotation, and Scale in the game world and cannot be removed.
You can nest Game Objects inside another, and you do not need to add any components to a Game Object so you can use empty Game Objects to organize your project.
Every object has a Name, an optional Tag (like “Player” or “Enemy”), and a Layer (used to control physics collisions and camera rendering).
Setting Up The Input Manager
The first thing we need to do is set up the Input Manager. For this game, we will make the Input Manager responsible for all input.
Since we are using the new Input System, we will also have easy access to use a gamepad or another input device.
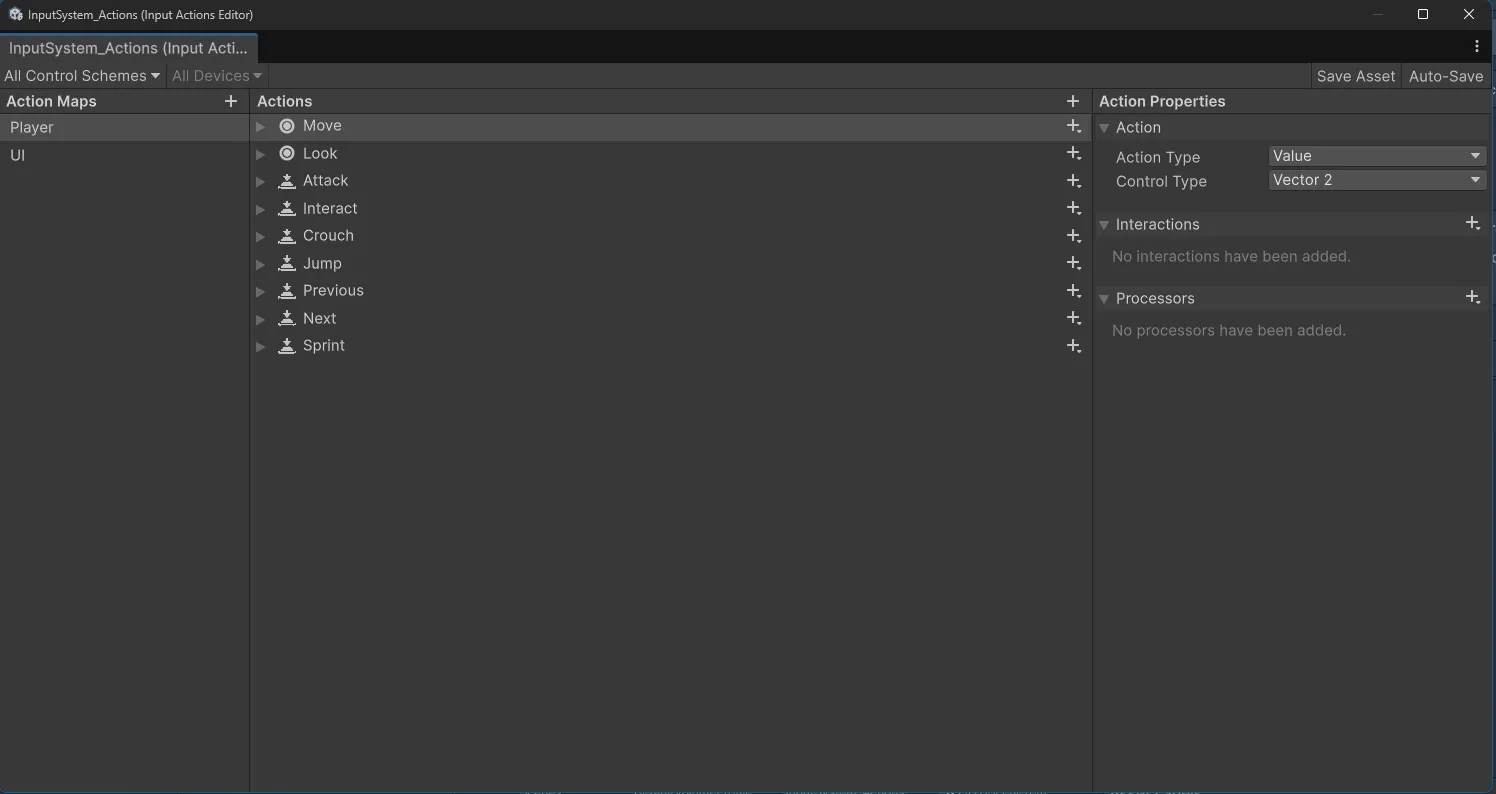
This is the default Input Asset that comes with Unity. It is a collection of all the input actions that Unity supports. We will be modifying this file to add our own input actions.
The asset is divided into 2 Action Maps. Each Action Map is a collection of input actions that are related to each other. For example, the Player Action Map will contain all the input actions that are related to the player.
For this game, we will be removing the input actions we don’t need from the Player Action Map.
But before we do that, we’re going to make a copy of the Input Asset Unity provides us. This is because that asset is the Default Project Wide Input Settings Asset. This will become important when we set up the Player Input component.
I am going to call this asset PlayerInputActions as it describes what the asset is used for. I will create a separate folder to store this asset outside the Settings folder in its own folder called Input.
For now, we’ll leave the UI Action Map alone. We’ll return to it later in this series when we add UI elements to the game.
Configuring The Input Asset
In our scene let’s create a GameObject and name it GameInput, once we have done that, we can add a Player Input component to it. This component will be responsible for handling all input for the game.
At first, you will see a warning from Unity. Unity expects us to provide a separate Input Asset for the Player Input component. You can’t use the Default Project Wide Input Settings Asset as Unity uses that for local multiplayer games.
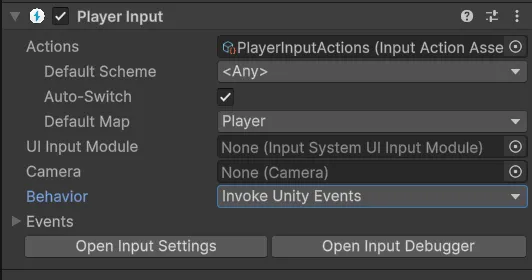
Let’s walk through the settings displayed in the Player Input component.
Default Scheme: Leave this set toAnyto allow the player to use whatever device the actions support.Auto-Switch: Leave this set toTrueto allow the player component to automatically switch between input schemes. You can turn this off if you are trying to lock the player to a specific input device.Default Map: Leave this set toPlayer, when the game starts, we want any input mapped to thePlayer.UI Input Module: Leave this set toNonewe won’t touch this for now.Camera: Leave this set toNonewe won’t touch this for now.Behavior: There are four options for this :Send Messages: This will call a function call based on the action name to theGameObjectthePlayerInputcomponent is attached to.Broadcat Messages: This will call a function call based on the action name to allGameObjectsthat thePlayerInputcomponent is attached and its children.Invoke Unity Events: This will call a function you define to the class object you set in the Inspector.Invoke C Sharp Events: This is for a custom event system you design, which we won’t touch for now.
Creating the Player Sprite
Next I am going to create a sprite for the player. I am going to use a simple square sprite for now. Let’s reinforce Unity’s component-based system by creating a new Sprite asset manually.
First, let’s set up the folder structure. Create a new folder directly under the Assets folder called Art. Then create a subfolder called Sprites and from there another subfolder called Unity.
This way my project will be organized and easy to navigate, and I immediately know the asset comes from using the Unity Editor.
So I go the Assets folder and right-click and select Create > 2D Object > Sprite.
This creates a new 256*256 pixel square sprite. You can check out the sprite properties in the Inspector.
Setting up the Dungeon Walls
We’re going to create the dungeon walls next. I am going to use a simple square sprite for now. We’ll create proper dungeon tiles using the Unity Tilemap system later in the series.
For now, drag the Sprite asset from the Art/Sprites/Unity folder into the hierarchy. That will create a new GameObject with a SpriteRenderer component attached to it. You can check out the SpriteRenderer properties in the Inspector.
We are going to set the scale of the game object so it fits along the bottom of the screen. Once you are satisfied with the scale, you can adjust the position of the game object as needed.
Add a Box Collider 2D component to the game object. This will allow us to detect collisions with the walls.
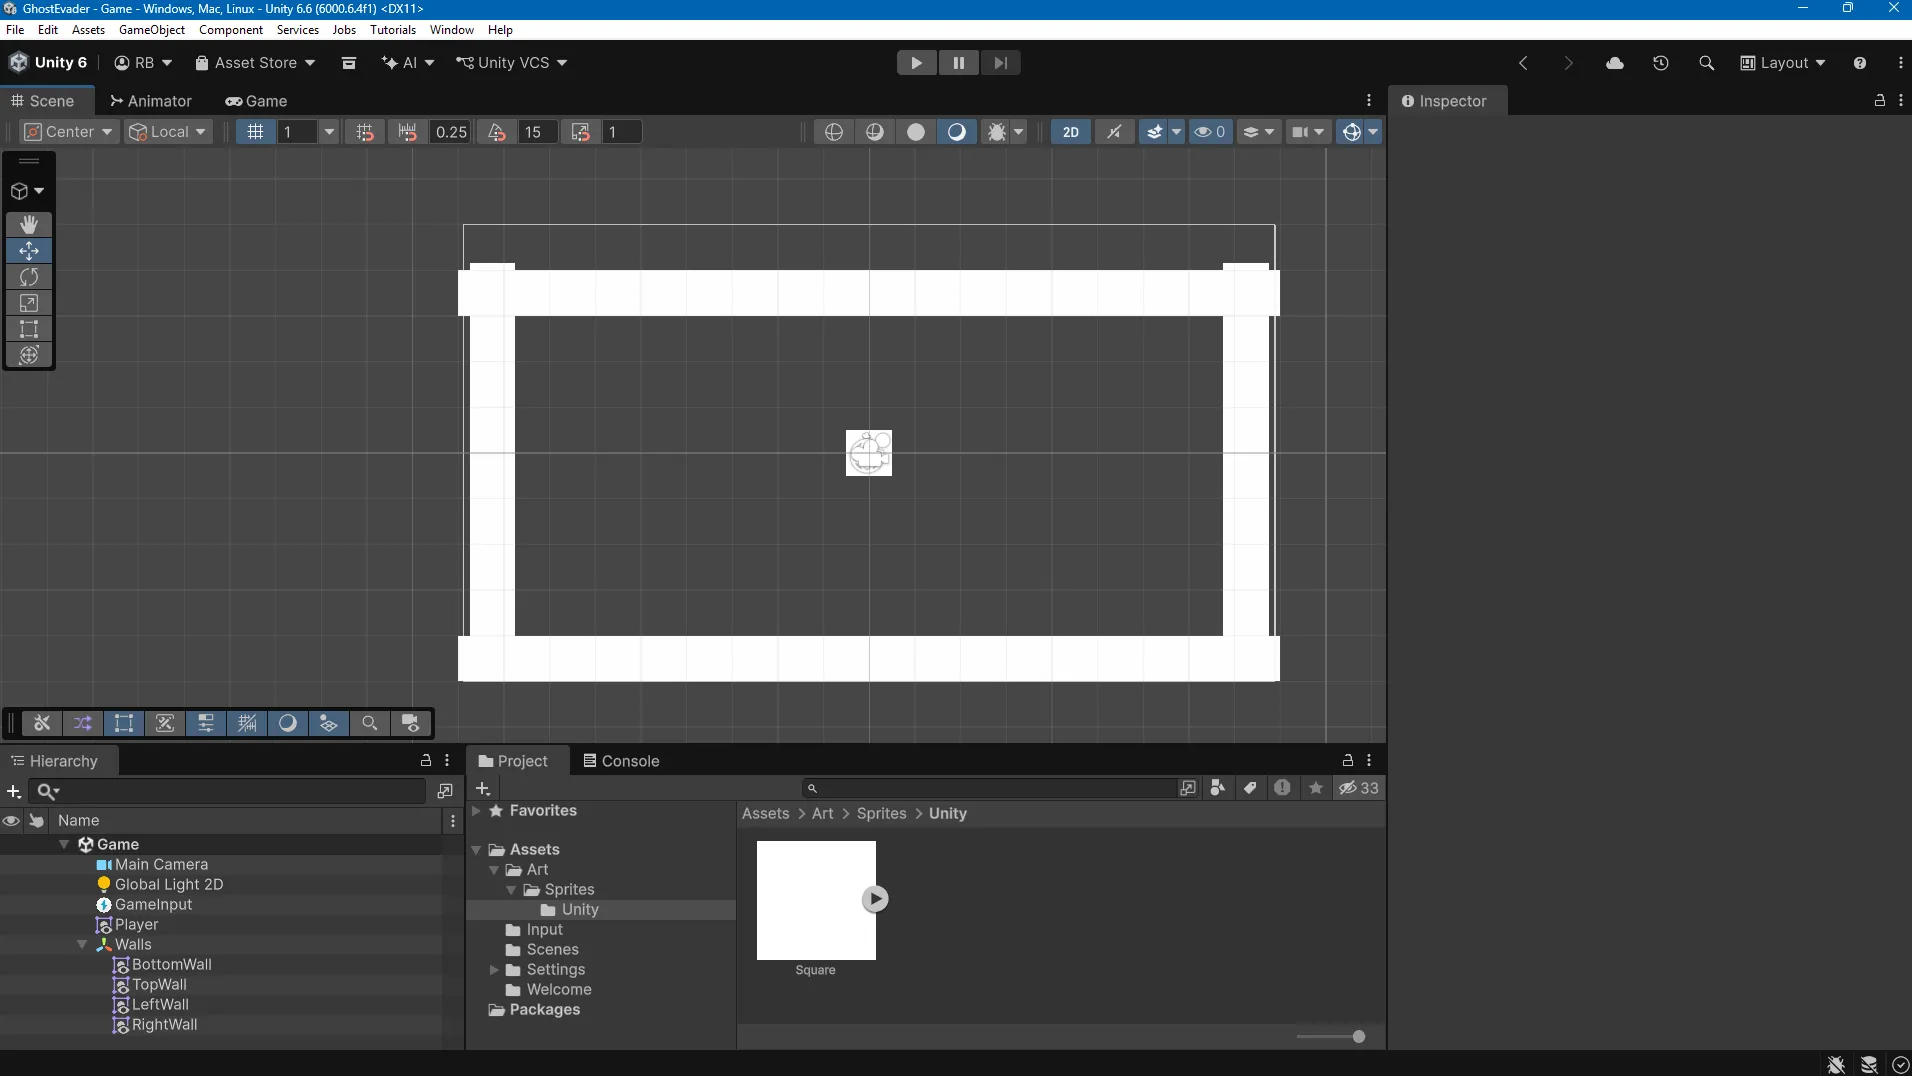
From there you can duplicate the bottom wall game object and place it along the top of the screen. You can adjust the position of the game objects as needed.
You can repeat this process for the left and right walls as well.
This should give you a basic dungeon layout with walls on all four sides.
Conclusion
Now we have a player game object, some walls, and an Input asset ready to go. Next we will write the code to get the player moving